Ed’s Green Bean Casserole Recipe
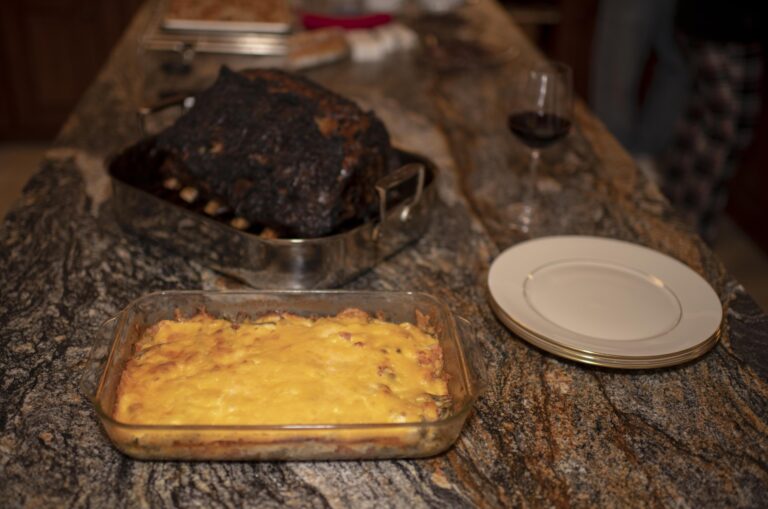
Now this Green Bean Casserole is kicked up a notch from your average Campbell’s recipe. This is a real crowd pleaser! The first time I had this casserole was at Thanksgiving when my father- in-law (Ed) introduced me to a new way of doing green beans. I then made it for our company Christmas party everyone was raving about it. I’ll never be able to go back to the old recipe and I’m sure your family won’t either. I hope you enjoy!
- Preheat the oven to 350
- Line a 3 qt baking dish with bread crumbs – I use Italian.
- Use a large bowl to combine the following:
- 1 big can of artichoke hearts, quartered
- 2 large tomatoes, peeled, seeded then coarse chop
- 2 cans of whole green beans, rinsed
- A sprinkle of garlic powder – I use a heavy sprinkle
- 1/8 cup of Parmesan Cheese grated – I use Parmesan Reggiano
- 1⁄2 cup of grated Swiss cheese – I use Gruyere
- Combine and Add:
- 3⁄4 cup of Mayonnaise – I like Hellman’s
- 3⁄4 cup of sour cream
- 1/3 cup of onions, chopped fine
- After mixing all the ingredients in the large bowl transfer to the prepared baking dish.
- The last ingredient is shredded cheddar cheese. Top off the dish with as much shredded cheese as you like. I use at least a cup.
- Put it in the oven for about 30 minutes and you’re good to go.
Creative Kitchen Design Provide Solutions
Steve and Bettina Scharrer have lived in their 1976, tri-level home for over 20 years. They have raised two wonderful children here and now enjoy spending quite a bit of time with their grandchildren. They couldn’t imagine leaving a place with so many memories.
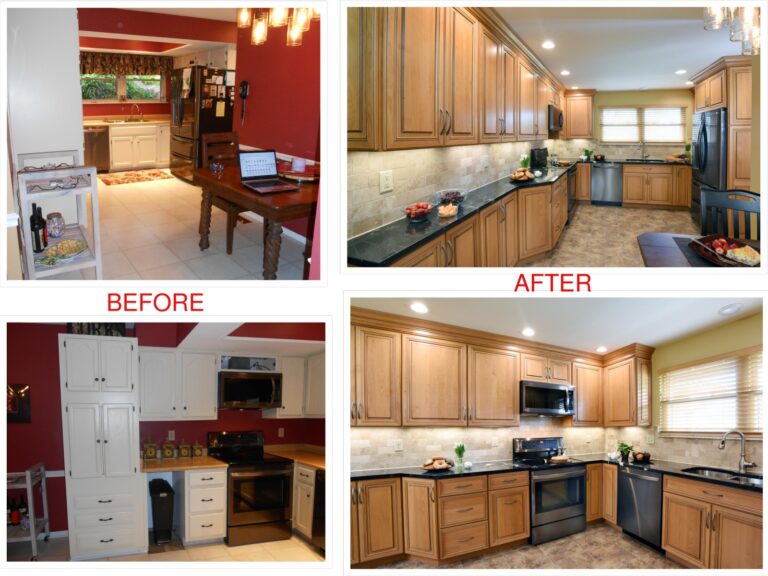
It was finally time to do a major renovation to the kitchen. Although the space wasn’t large, Steve and Bettina knew it could have a better kitchen design (and so did we). Bettina knew she wanted new cabinets, countertops, backsplash tile and flooring, but wasn’t quite sure how to take the remodel one step further. We were able to give them a few ideas they fell in love with that dramatically changed the way their kitchen functioned.

The last change we made isn’t obvious to the eye but made a huge impact. It was important to Bettina and Steve to keep a full-size refrigerator. They did not want to change to a cabinet depth, which are inherently smaller appliances. The solution was to steal four inches of space from the front entry closet to push the refrigerator back and out of the middle of the kitchen. Doing this allowed them to utilize the corner cabinet, as well as the countertop space in that corner much more efficiently. We also took out the pantry closet and installed a more proficient pantry cabinet with a huge pull-out.
Ultimately, we took a 1970s kitchen, and not only updated it but utilized the space to its fullest potential and put together the perfect kitchen design for them. We had the best time working with Bettina and Steve and they were very happy with the kitchen and the service they received.
See our full newsletter here.
